OpenSSH server
An SSH VPN profile needs no VPN software on the server: the OpenSSH server that Ubuntu already runs carries the phone's TCP connections. This page sets up a user that may only forward TCP, shows where the host key's fingerprint comes from, and installs the optional UDP relay. Its last part sets up the profile in the app, on iPhone and on Android.
We ran these steps on our test server, Ubuntu 24.04 with OpenSSH 9.6, 2 vCPUs and 2 GB of memory, on 7 November 2026, and read every setting back from it; then both phones connected as the page's user, with the host key pinned and UDP Relay on (ssh-guide-udp-download). Two steps ran differently: the relay program was copied from a copy already on the server, which has the SHA-256 on this page, instead of being downloaded, and the password was set without passwd's prompt. The phones' other results named on this page come from the runs listed in Test results.
What you need
- An Ubuntu server with a public IPv4 address. Ubuntu 24.04 comes with OpenSSH 9.6.
- The SSH port open to the phones, TCP 22 unless you change it. A DNS name is optional: the app connects to a name or an address, and SSH has no certificate to match a name.
1. A user for the VPN
Give the phones their own users, in a group of their own, with no shell:
groupadd vpnusers
useradd -M -d /nonexistent -s /usr/sbin/nologin -g vpnusers vpnuser
passwd vpnuser
passwd asks for the password twice. In the app this is Username and Password. The app logs in with a password; it has no key login.
2. What the users may do
This file lets the group's users forward TCP connections, which is all the app does, and nothing else: no shell, no terminal, no other kind of forwarding:
Match Group vpnusers
    PasswordAuthentication yes
    AllowTcpForwarding local
    AllowStreamLocalForwarding no
    AllowAgentForwarding no
    X11Forwarding no
    PermitTunnel no
    PermitTTY no
    PermitUserRC no
    GatewayPorts no
    ForceCommand /usr/sbin/nologin
sshd -t
systemctl reload sshsshd -t prints nothing when the file is right. AllowTcpForwarding local is the line the app depends on: with no, the app refuses to connect with The server does not let this user forward TCP connections. PasswordAuthentication yes in the group's block keeps password logins working for these users on servers whose own setting is no; a server that offers only keyboard-interactive (PAM) logins works too, as the app answers its password prompt. Configuration Reference lists what each server setting does to the app.
3. The host key's fingerprint
With the fingerprint in the profile's Host Key, the app connects only to the server that has that key. Read it on the server:
ssh-keygen -lf /etc/ssh/ssh_host_ed25519_key.pubIt prints a line such as 256 SHA256:Lp3gKqZ2u7eFv0yQm9aWcXbT1rJ5nH8sD4oE6iU2kYA root@server (ED25519); the app takes the whole line or the SHA256:… part alone. Use the ED25519 key: the app asks for the server's keys in the order OpenSSH's own client does, so a server with an ED25519 key shows that one, and a fingerprint of its ECDSA or RSA key does not match. It is also the fingerprint ssh shows the first time a computer connects to the server.
4. The UDP relay (optional)
SSH forwards TCP only. With UDP Relay on, the app sends UDP through the SSH session to hev-socks5-server on the server, which sends it on. Without the relay, everything but UDP works: DNS too, as the app answers names itself. The app reaches the relay as 127.0.0.1 port 1080 on the server, so it must listen there; on the loopback address only, nobody outside the server can use it.
curl -fLo /usr/local/bin/hev-socks5-server https://github.com/heiher/hev-socks5-server/releases/download/2.13.1/hev-socks5-server-linux-x86_64
echo "9707a6d9e6419f6474173affa9d00b25a9ec61c9f320f2d19bb14a0a5a584bc5  /usr/local/bin/hev-socks5-server" | sha256sum -c
chmod 755 /usr/local/bin/hev-socks5-server
useradd -r -M -d /nonexistent -s /usr/sbin/nologin hev-relay
mkdir -p /etc/hev-socks5-server
sha256sum -c prints OK: the file is version 2.13.1 as GitHub publishes it. Its configuration:
main:
  workers: 1
  port: 1080
  listen-address: '127.0.0.1'
misc:
  log-level: warn
And a service that starts it at boot, as an unprivileged user:
[Unit]
Description=HEV UDP relay for SSH VPN profiles
Wants=network-online.target
After=network-online.target

[Service]
User=hev-relay
Group=hev-relay
ExecStart=/usr/local/bin/hev-socks5-server /etc/hev-socks5-server/main.yml
Restart=on-failure
RestartSec=3
NoNewPrivileges=yes
ProtectSystem=strict
ProtectHome=yes
RestrictAddressFamilies=AF_INET AF_INET6 AF_UNIX

[Install]
WantedBy=multi-user.target
systemctl daemon-reload
systemctl enable --now hev-socks5-server
ss -tlnp | grep 1080ss shows hev-socks5-serv listening on [::ffff:127.0.0.1]:1080, the loopback address 127.0.0.1 written as IPv6. With the relay stopped, a profile with UDP Relay on is refused with The UDP relay (HEV) is unavailable on the server, and one with it off connects as usual.
5. Firewall
Only the SSH port needs to be open; the relay stays on the loopback address. If ufw is active: ufw allow 22/tcp. Our server has no firewall of its own.
6. Check from a computer
Any computer with OpenSSH can do what the app does. This forwards a local port to the relay through the SSH session and asks a web service which address it sees:
ssh -N -L 1080:127.0.0.1:1080 vpnuser@<SERVER_IP>
curl --socks5-hostname 127.0.0.1:1080 https://api.ipify.org
Run curl in a second terminal: it prints the server's address. A user without TCP forwarding gets administratively prohibited from ssh instead. On the server, journalctl -u ssh shows each login, and pkill -u vpnuser ends a user's sessions.
7. Set up the app on the phone
Install SRP VPN Connect first: on iPhone or on Android, each in its own way. An SSH VPN profile has the same fields on both, so the steps below are the same on iPhone and Android; only the permission at the first connection differs.
Create the profile
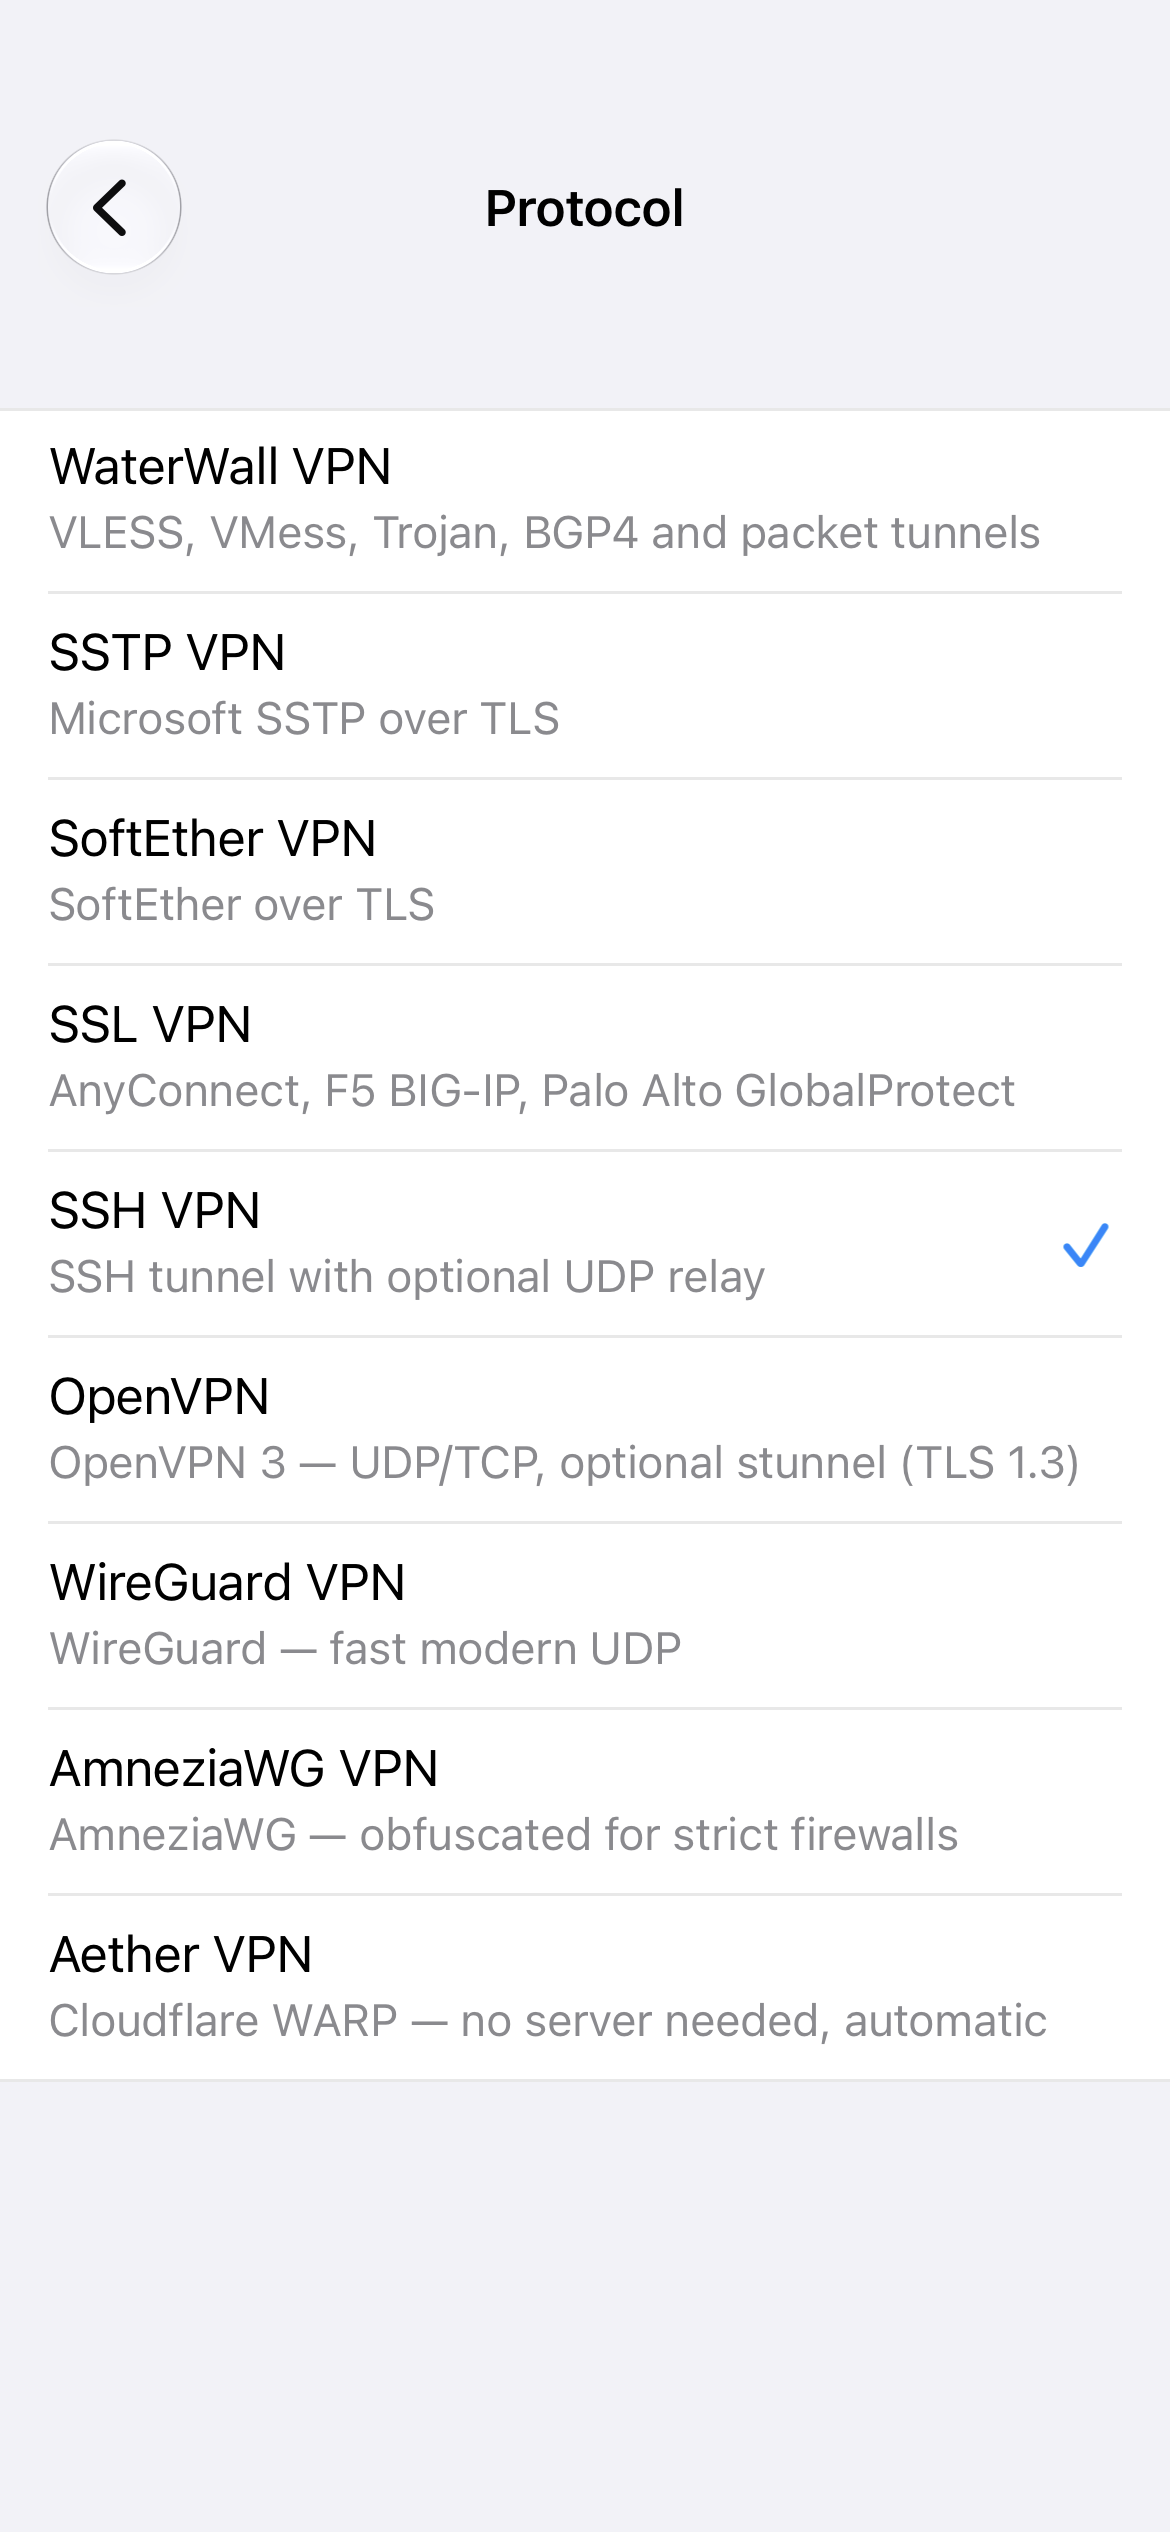
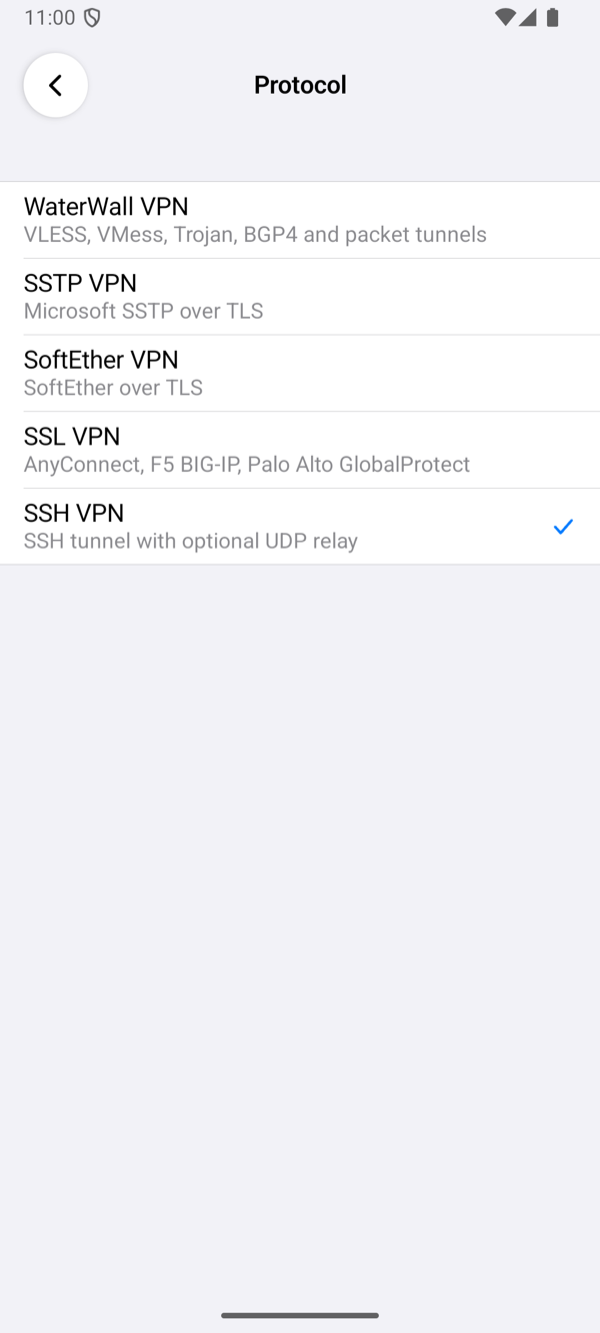
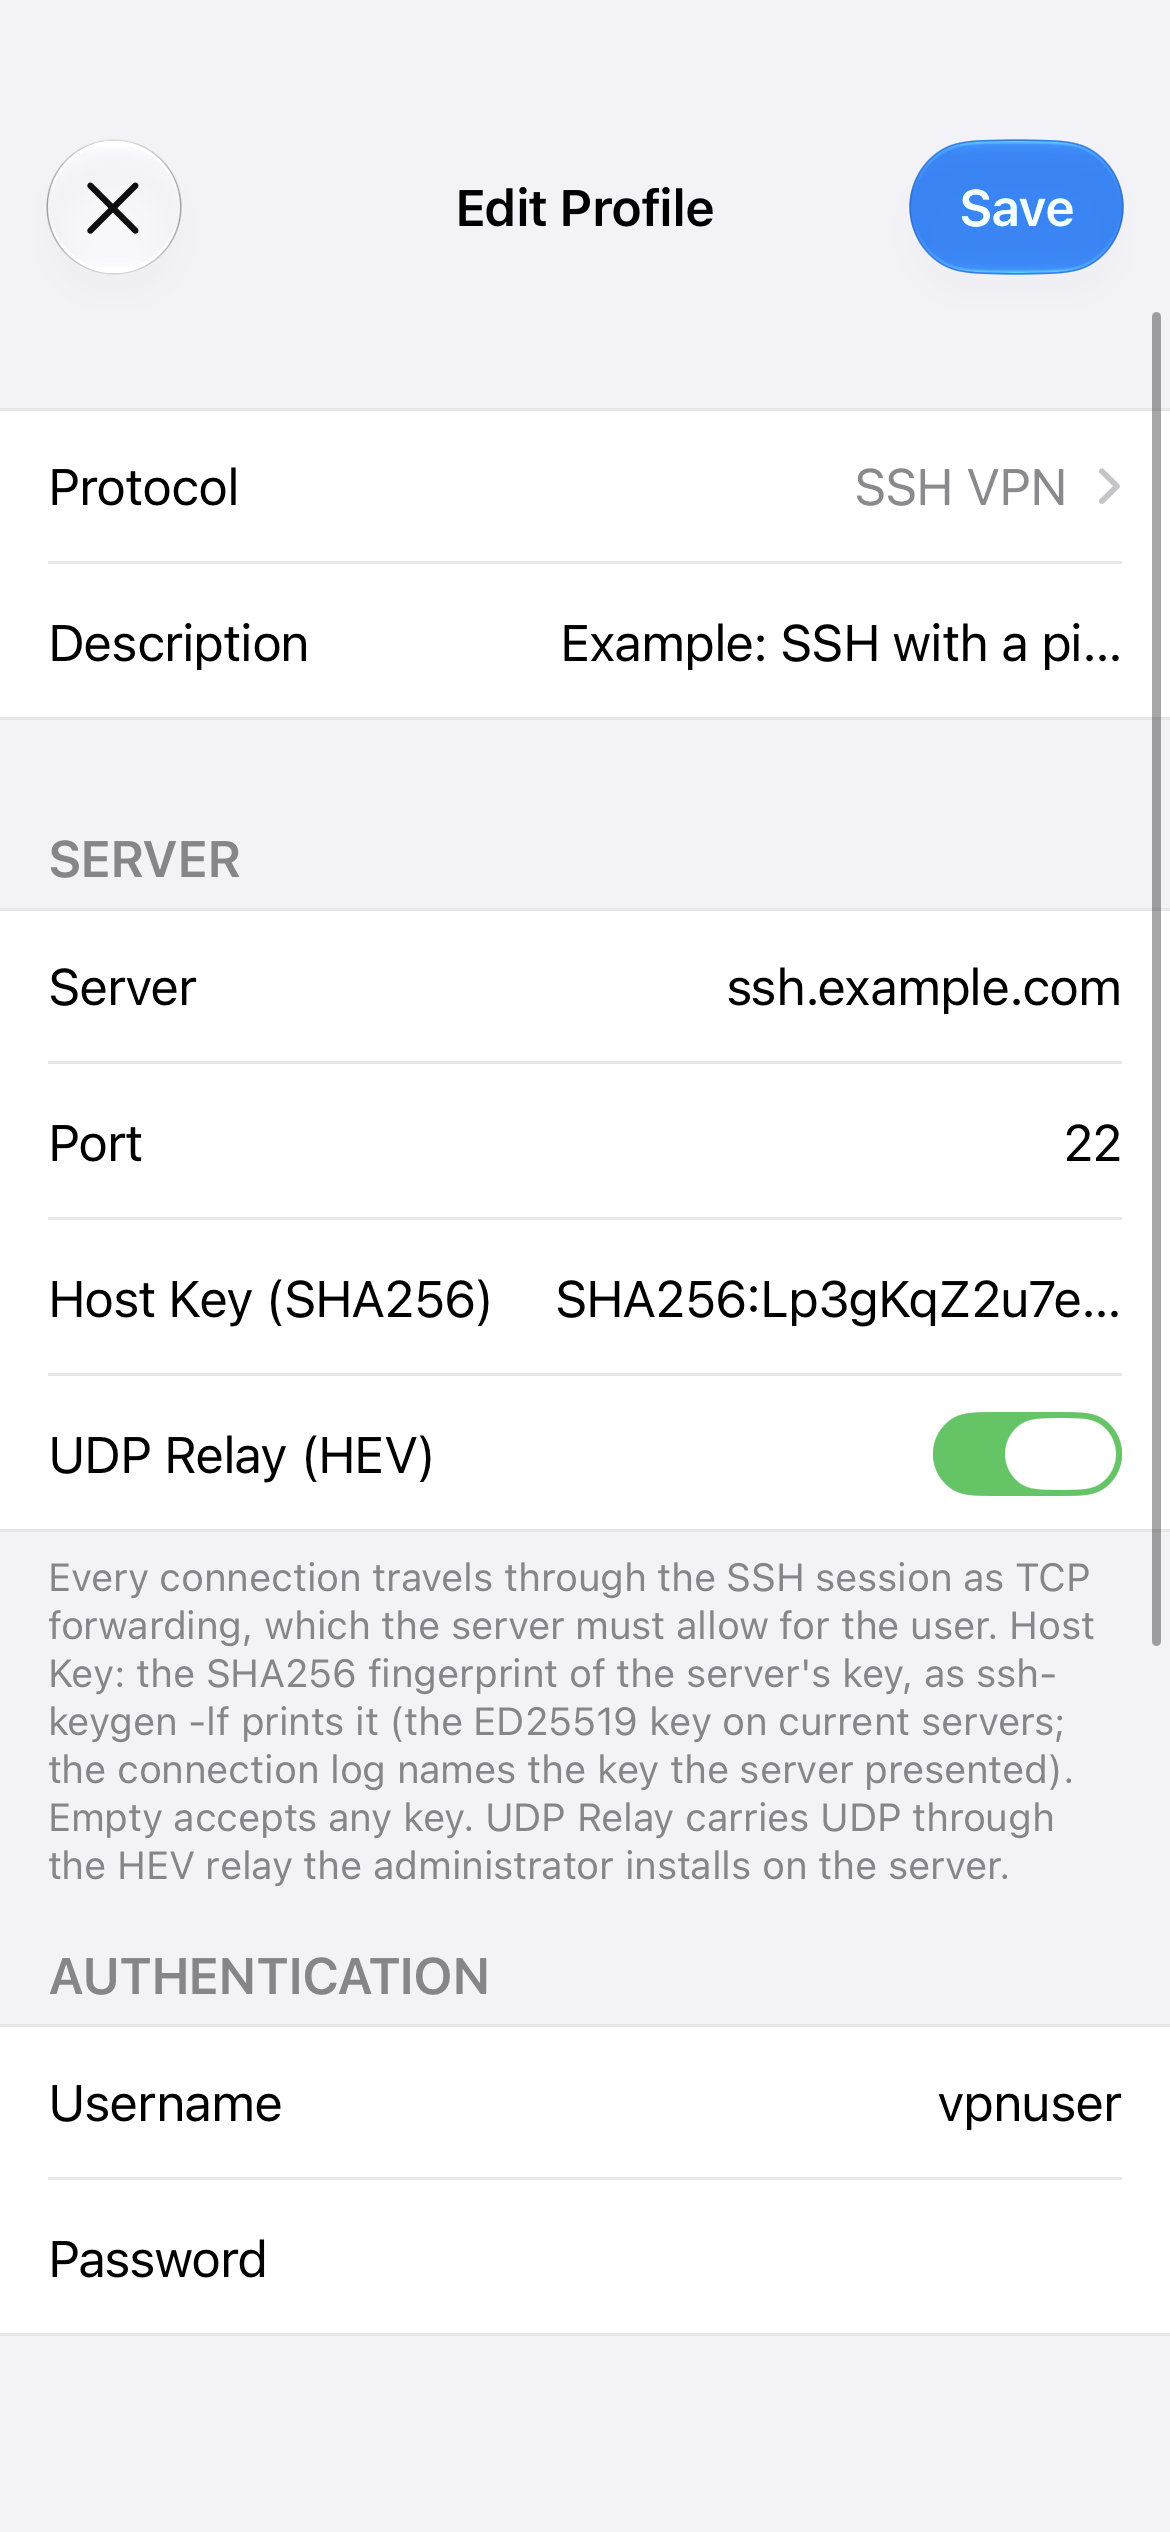
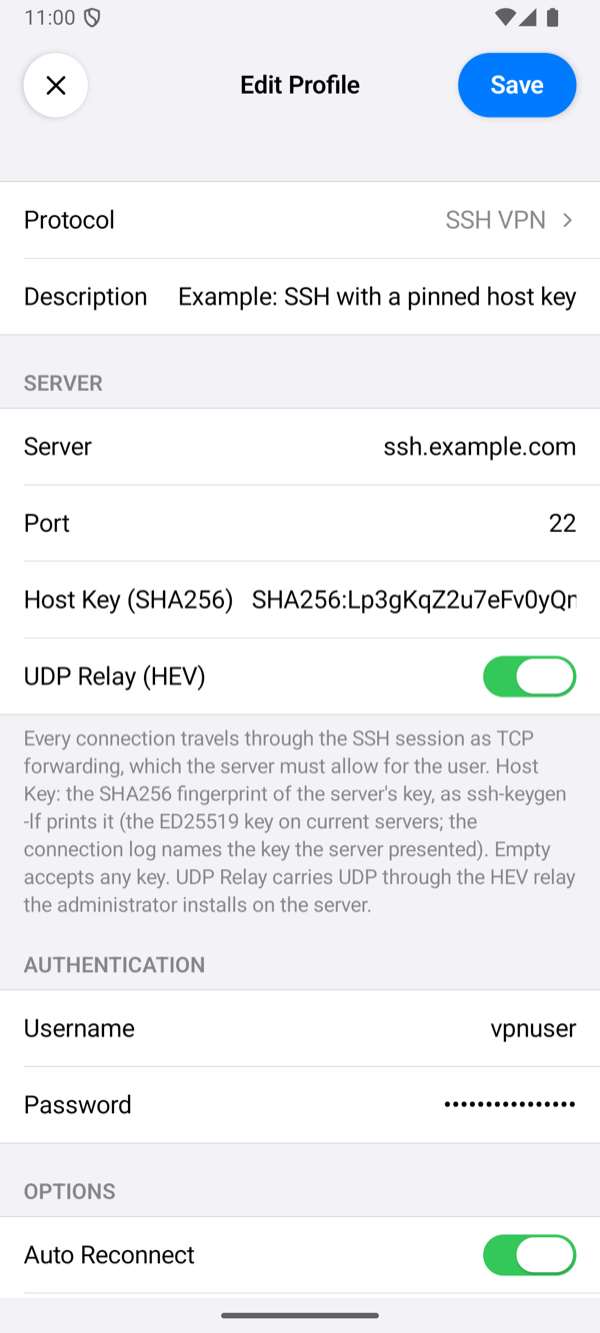
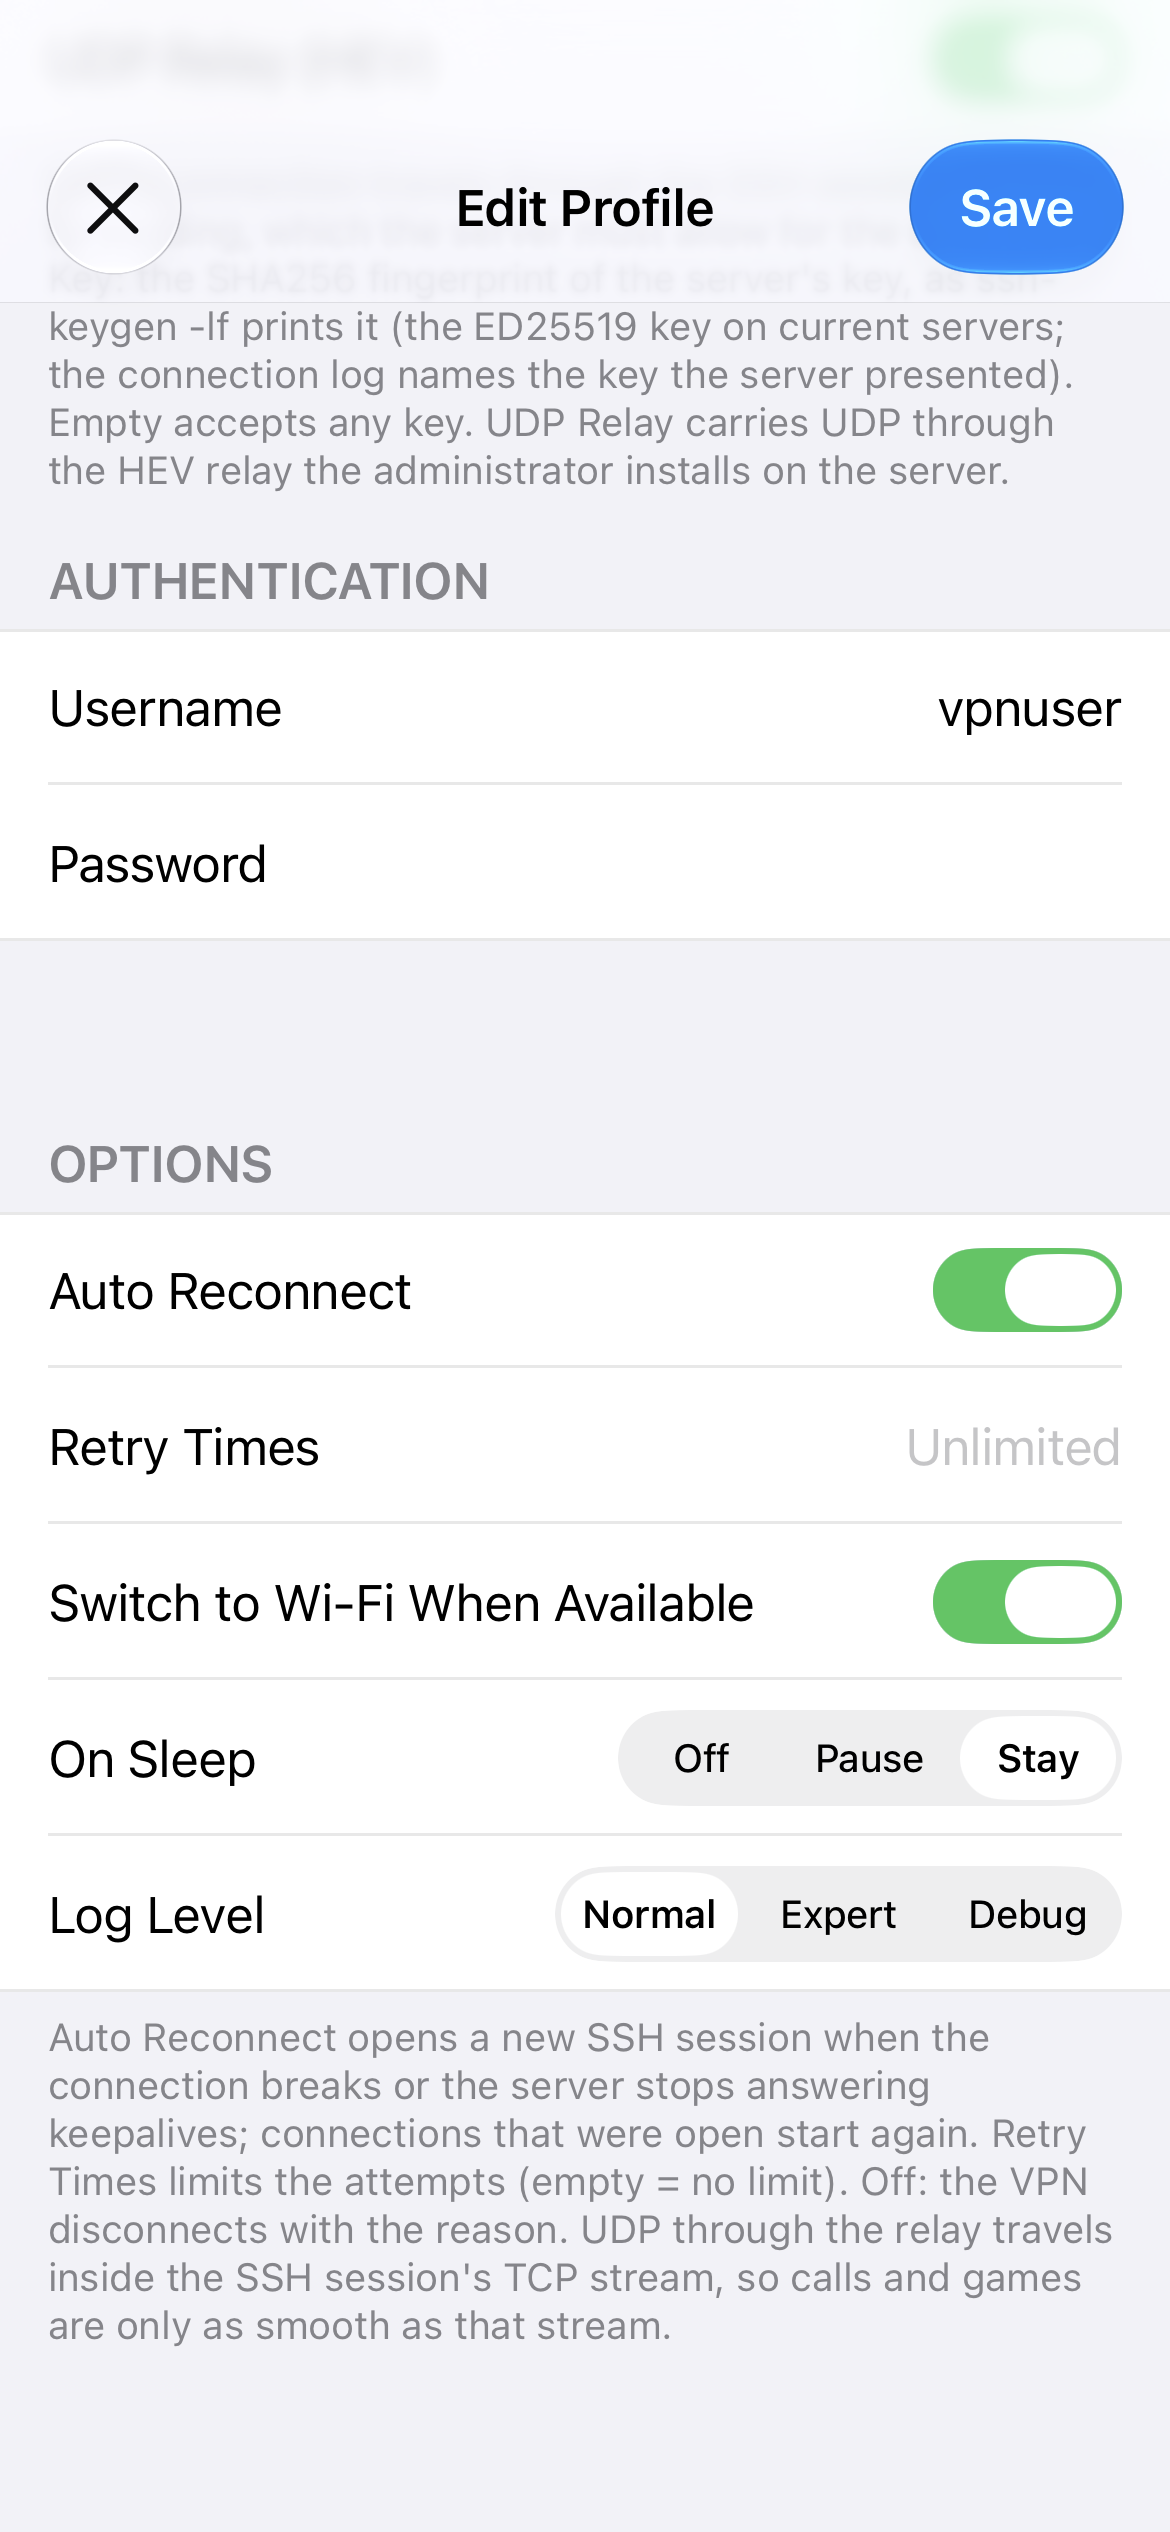
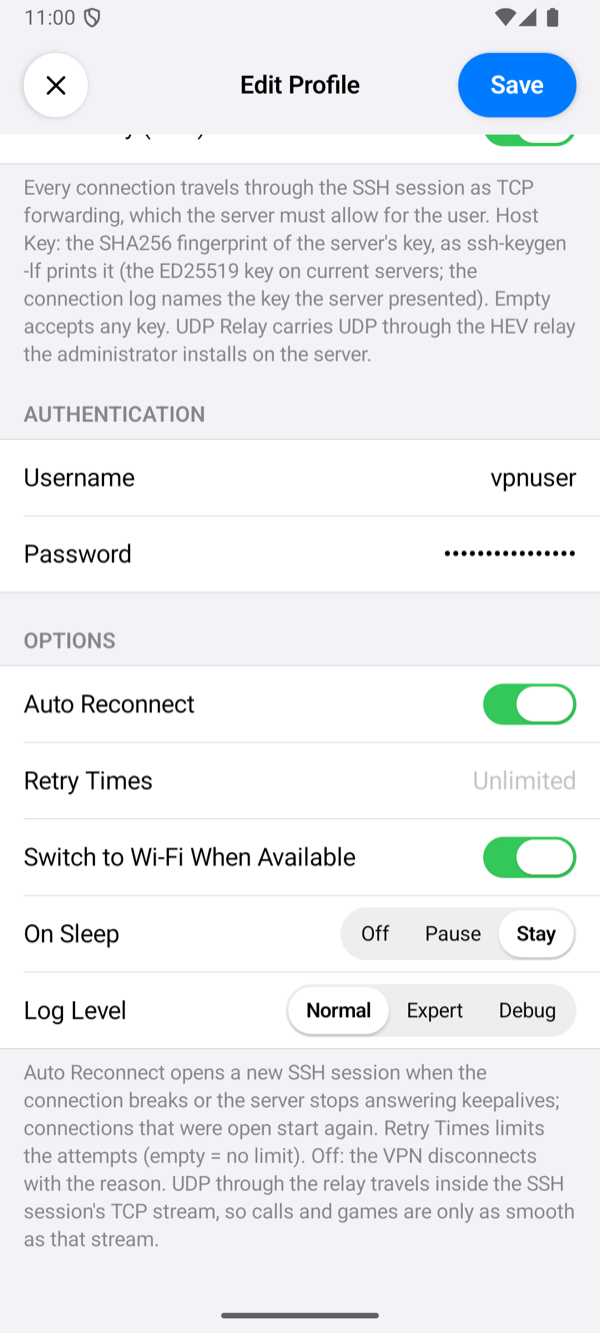
- On the home screen, tap +, tap Protocol and choose SSH VPN.
- Description: optional, the profile's name on the home screen. When it is empty, the home screen shows the server's name or address.
- Server: the server's address,
<SERVER_IP>, or its DNS name if it has one. - Port:
22, or the server's SSH port if you changed it. - Host Key (SHA256): the fingerprint from part 3, the
SHA256:…part of the linessh-keygen -lfprinted, or the whole line. With it, the app connects only to the server that has that key. - Optional: if you installed the relay in part 4, turn UDP Relay (HEV) on. Left off, everything but UDP works, DNS too.
- Username:
vpnuser, the user from part 1. Password: the password you gavepasswdin part 1. - Leave everything under OPTIONS as it is, and tap Save.
Connect
- On the home screen, tap the profile to select it, then tap the power button.
- The first time, the system asks for permission: iOS asks whether the app may add a VPN configuration, and Android shows a Connection request. Allow it.
- The status changes to Connected once the app has logged in and the checks have passed, and the row of the profile shows the time of one request through the tunnel.
journalctl -u ssh from part 6 shows the phone's login, a line with Accepted password for. If the app shows Connection Failed instead, Troubleshooting explains its reason; tap the status under the power button to open the log.
Setting up the app describes every field.