WireGuard server
This page sets up WireGuard on Ubuntu 24.04 for the app: the server's keys and its interface wg0, forwarding and NAT so the phones reach the internet through it, a configuration file for each phone that the app imports, and removing a phone again. Its last part sets up the profile in the app, on iPhone and on Android.
We ran these steps on our test server, Ubuntu 24.04 with the kernel's WireGuard (Linux 6.8) and wireguard-tools 1.0.20210914, 2 vCPUs and 2 GB of memory, on 8 November 2026, as the page shows them, with our server's name in place of vpn.example.com; then both phones connected with the page's phone1.conf, and phone2, removed as part 5 says, was refused (the wg-guide-… cases in Test results). Three things ran differently: the port was 51821, as WaterWall's own WireGuard holds 51820 on our server; the ufw line of part 3 was not run, as a rule of ours already opened the port; and part 5 removed phone2, which we had added with part 4's script for that. After systemctl restart wg-quick@wg0 the server still had phone1, as SaveConfig = true keeps it.
What you need
- An Ubuntu 24.04 server with a public IPv4 address, and root on it. Its kernel has WireGuard built in.
- UDP port 51820 open to the phones. A DNS name for the server is optional: the phones' files may name the server or its address.
1. Install
apt update
apt install -y wireguard
This installs wg and wg-quick, the tools that configure the kernel's WireGuard.
2. The server's keys and wg0
cd /etc/wireguard
umask 077
wg genkey | tee server.key | wg pubkey > server.pub
cat > /etc/wireguard/wg0.conf <<EOF
[Interface]
Address = 10.66.66.1/24
ListenPort = 51820
PrivateKey = $(cat /etc/wireguard/server.key)
SaveConfig = true
PostUp = iptables -I FORWARD 1 -i %i -j ACCEPT; iptables -I FORWARD 2 -o %i -m conntrack --ctstate RELATED,ESTABLISHED -j ACCEPT; iptables -t nat -A POSTROUTING -s 10.66.66.0/24 -o ens160 -j MASQUERADE
PostDown = iptables -D FORWARD -i %i -j ACCEPT; iptables -D FORWARD -o %i -m conntrack --ctstate RELATED,ESTABLISHED -j ACCEPT; iptables -t nat -D POSTROUTING -s 10.66.66.0/24 -o ens160 -j MASQUERADE
EOFserver.keyis the server's private key andserver.pubits public key, which every phone's file names.umask 077keeps the keys readable by root only.Address = 10.66.66.1/24is the server's address inside the tunnel; the phones get the other addresses of 10.66.66.0/24.SaveConfig = trueletswg-quick savewrite the phones that part 4 adds back into this file, so they come back after a restart.- The
PostUplines let the phones' traffic through the server (also where ufw refuses routed traffic by default) and replace their addresses with the server's on the way out;PostDowntakes the rules away.ens160is the name of our server's network interface;ip route show defaultprints yours afterdev.
echo 'net.ipv4.ip_forward = 1' > /etc/sysctl.d/60-wireguard.conf
sysctl -p /etc/sysctl.d/60-wireguard.conf
systemctl enable --now wg-quick@wg0
wg show wg0
wg show prints the interface with its public key and listening port: 51820.
3. Firewall
Open UDP port 51820 to the phones. If ufw is active: ufw allow 51820/udp. The PostUp rules of part 2 already let the phones' traffic through.
4. A file for each phone
Each phone gets its own key pair, and its own preshared key, which adds a second secret to the handshake. This script makes them, adds the phone to wg0 and writes the file the app imports; save it as /etc/wireguard/add-phone.sh and put your server's name or address in endpoint=:
#!/bin/bash
# add-phone.sh NAME NUMBER: a key pair and a preshared key for the phone NAME, its peer on wg0 with the address
# 10.66.66.NUMBER, and /etc/wireguard/clients/NAME.conf, the file the app imports.
set -euo pipefail
name=$1; number=$2; endpoint=vpn.example.com:51820
cd /etc/wireguard
umask 077
mkdir -p clients
private=$(wg genkey); public=$(echo "$private" | wg pubkey); psk=$(wg genpsk)
echo "$public" > "clients/$name.pub"
wg set wg0 peer "$public" preshared-key <(echo "$psk") allowed-ips "10.66.66.$number/32"
wg-quick save wg0
cat > "clients/$name.conf" <<EOF
[Interface]
PrivateKey = $private
Address = 10.66.66.$number/32
DNS = 1.1.1.1, 8.8.8.8

[Peer]
PublicKey = $(cat server.pub)
PresharedKey = $psk
Endpoint = $endpoint
AllowedIPs = 0.0.0.0/0
PersistentKeepalive = 25
EOF
echo "/etc/wireguard/clients/$name.conf"
chmod 700 /etc/wireguard/add-phone.sh
/etc/wireguard/add-phone.sh phone1 2- It prints the file's name, here
/etc/wireguard/clients/phone1.conf. The file holds the phone's private key: whoever has it can connect as that phone. Copy it to the phone and import it in the app (Import Config), then delete the copies you do not need. AllowedIPs = 0.0.0.0/0sends all of the phone's IPv4 traffic through the VPN, andDNSnames the name servers it uses meanwhile; Configuration Reference explains the other lines.PersistentKeepalive = 25makes the phone send a keepalive every 25 seconds when nothing else goes (the server's log shows them), so routers between the phone and the server keep its path open.- Give each phone its own number, and its own file: one key on two phones does not work.
5. Removing a phone
This script takes a phone off wg0 at once and out of the saved configuration; save it as /etc/wireguard/remove-phone.sh:
#!/bin/bash
# remove-phone.sh NAME: the phone NAME off wg0 and out of wg0.conf, and its files deleted.
set -euo pipefail
name=$1
cd /etc/wireguard
wg set wg0 peer "$(cat "clients/$name.pub")" remove
wg-quick save wg0
rm -f "clients/$name.pub" "clients/$name.conf"
chmod 700 /etc/wireguard/remove-phone.sh
/etc/wireguard/remove-phone.sh phone2The server answers nothing to a key it does not know, so a removed phone cannot connect: the app waits for the handshake and then reports that the server did not answer it.
6. Check
wg show wg0Each phone is a peer with its allowed ips. A phone that connected has an endpoint (the address it came from), a latest handshake (WireGuard renews it every 2 minutes while traffic flows) and its transfer.
7. Set up the app on the phone
A WireGuard profile has the same fields on iPhone and Android; where the two phones differ, the steps say so. Install the app first: on iPhone from TestFlight (Installation), on Android by building it from the source (Installation). Where to start says which build to use.
Create the profile
- Copy
/etc/wireguard/clients/phone1.conf, the file part 4 made, to the phone. - On the home screen, tap +.
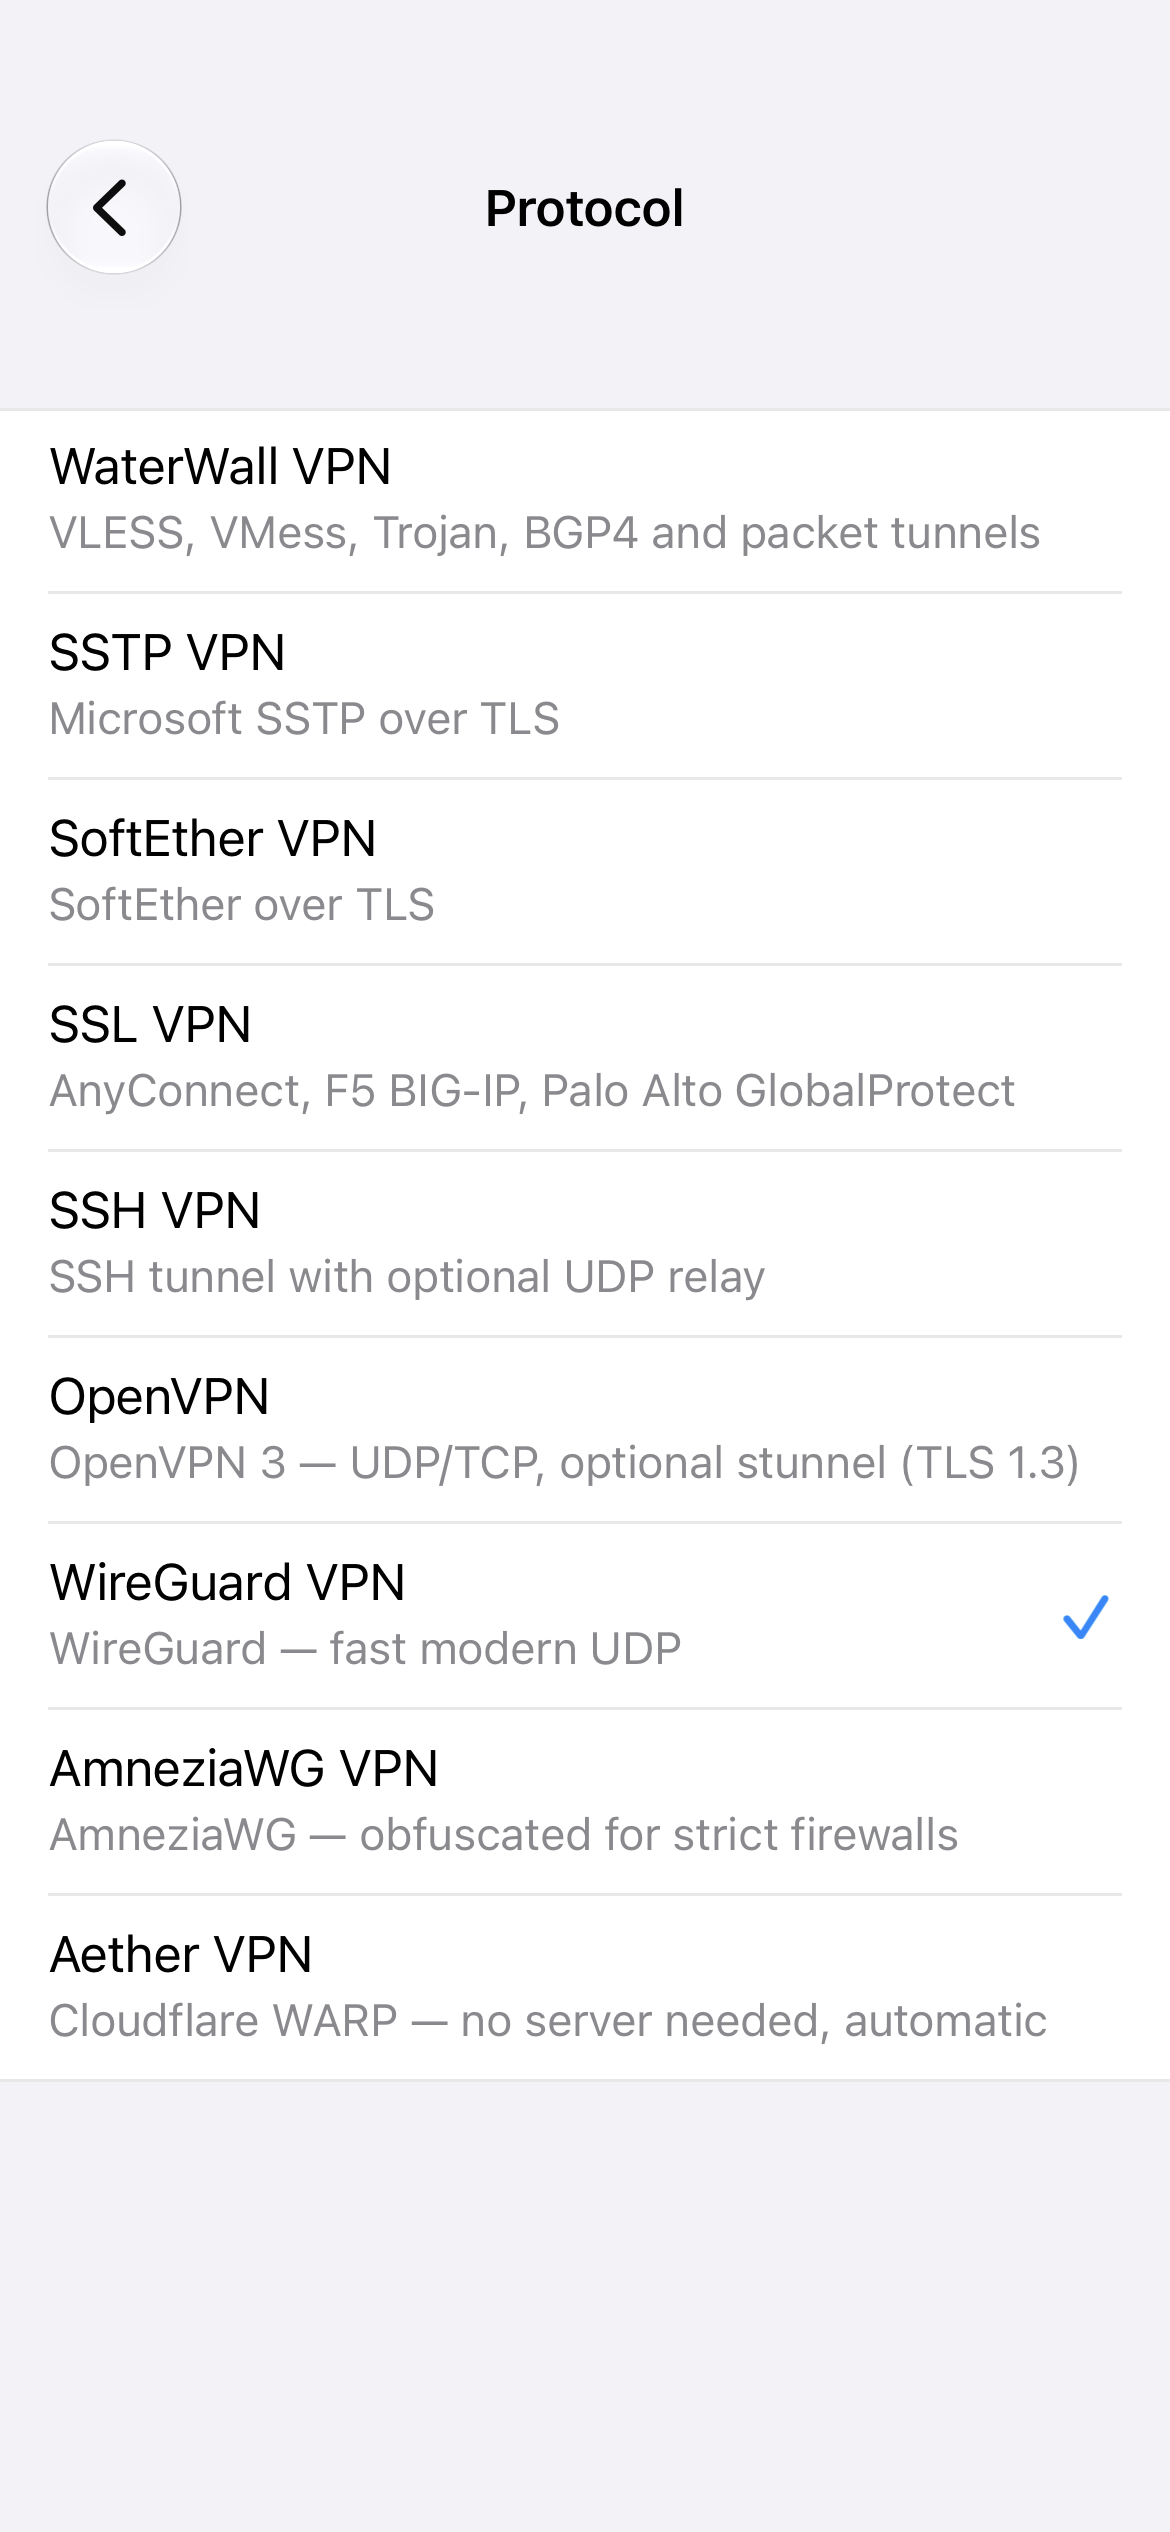
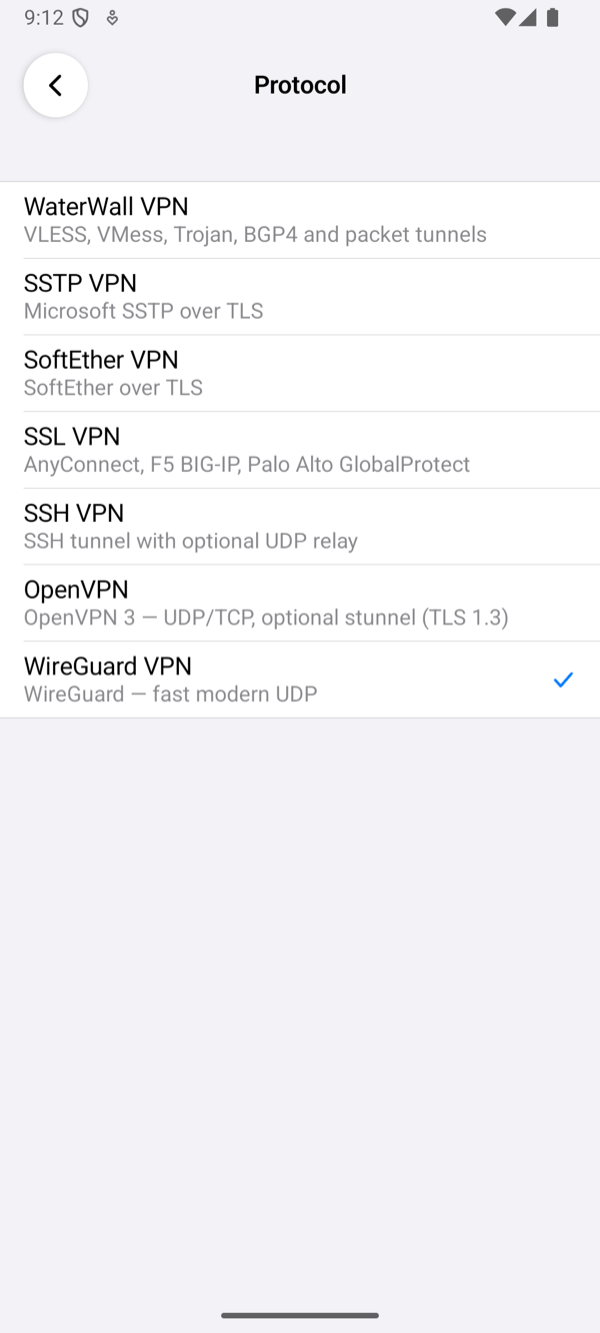
- Tap Protocol and choose WireGuard VPN.
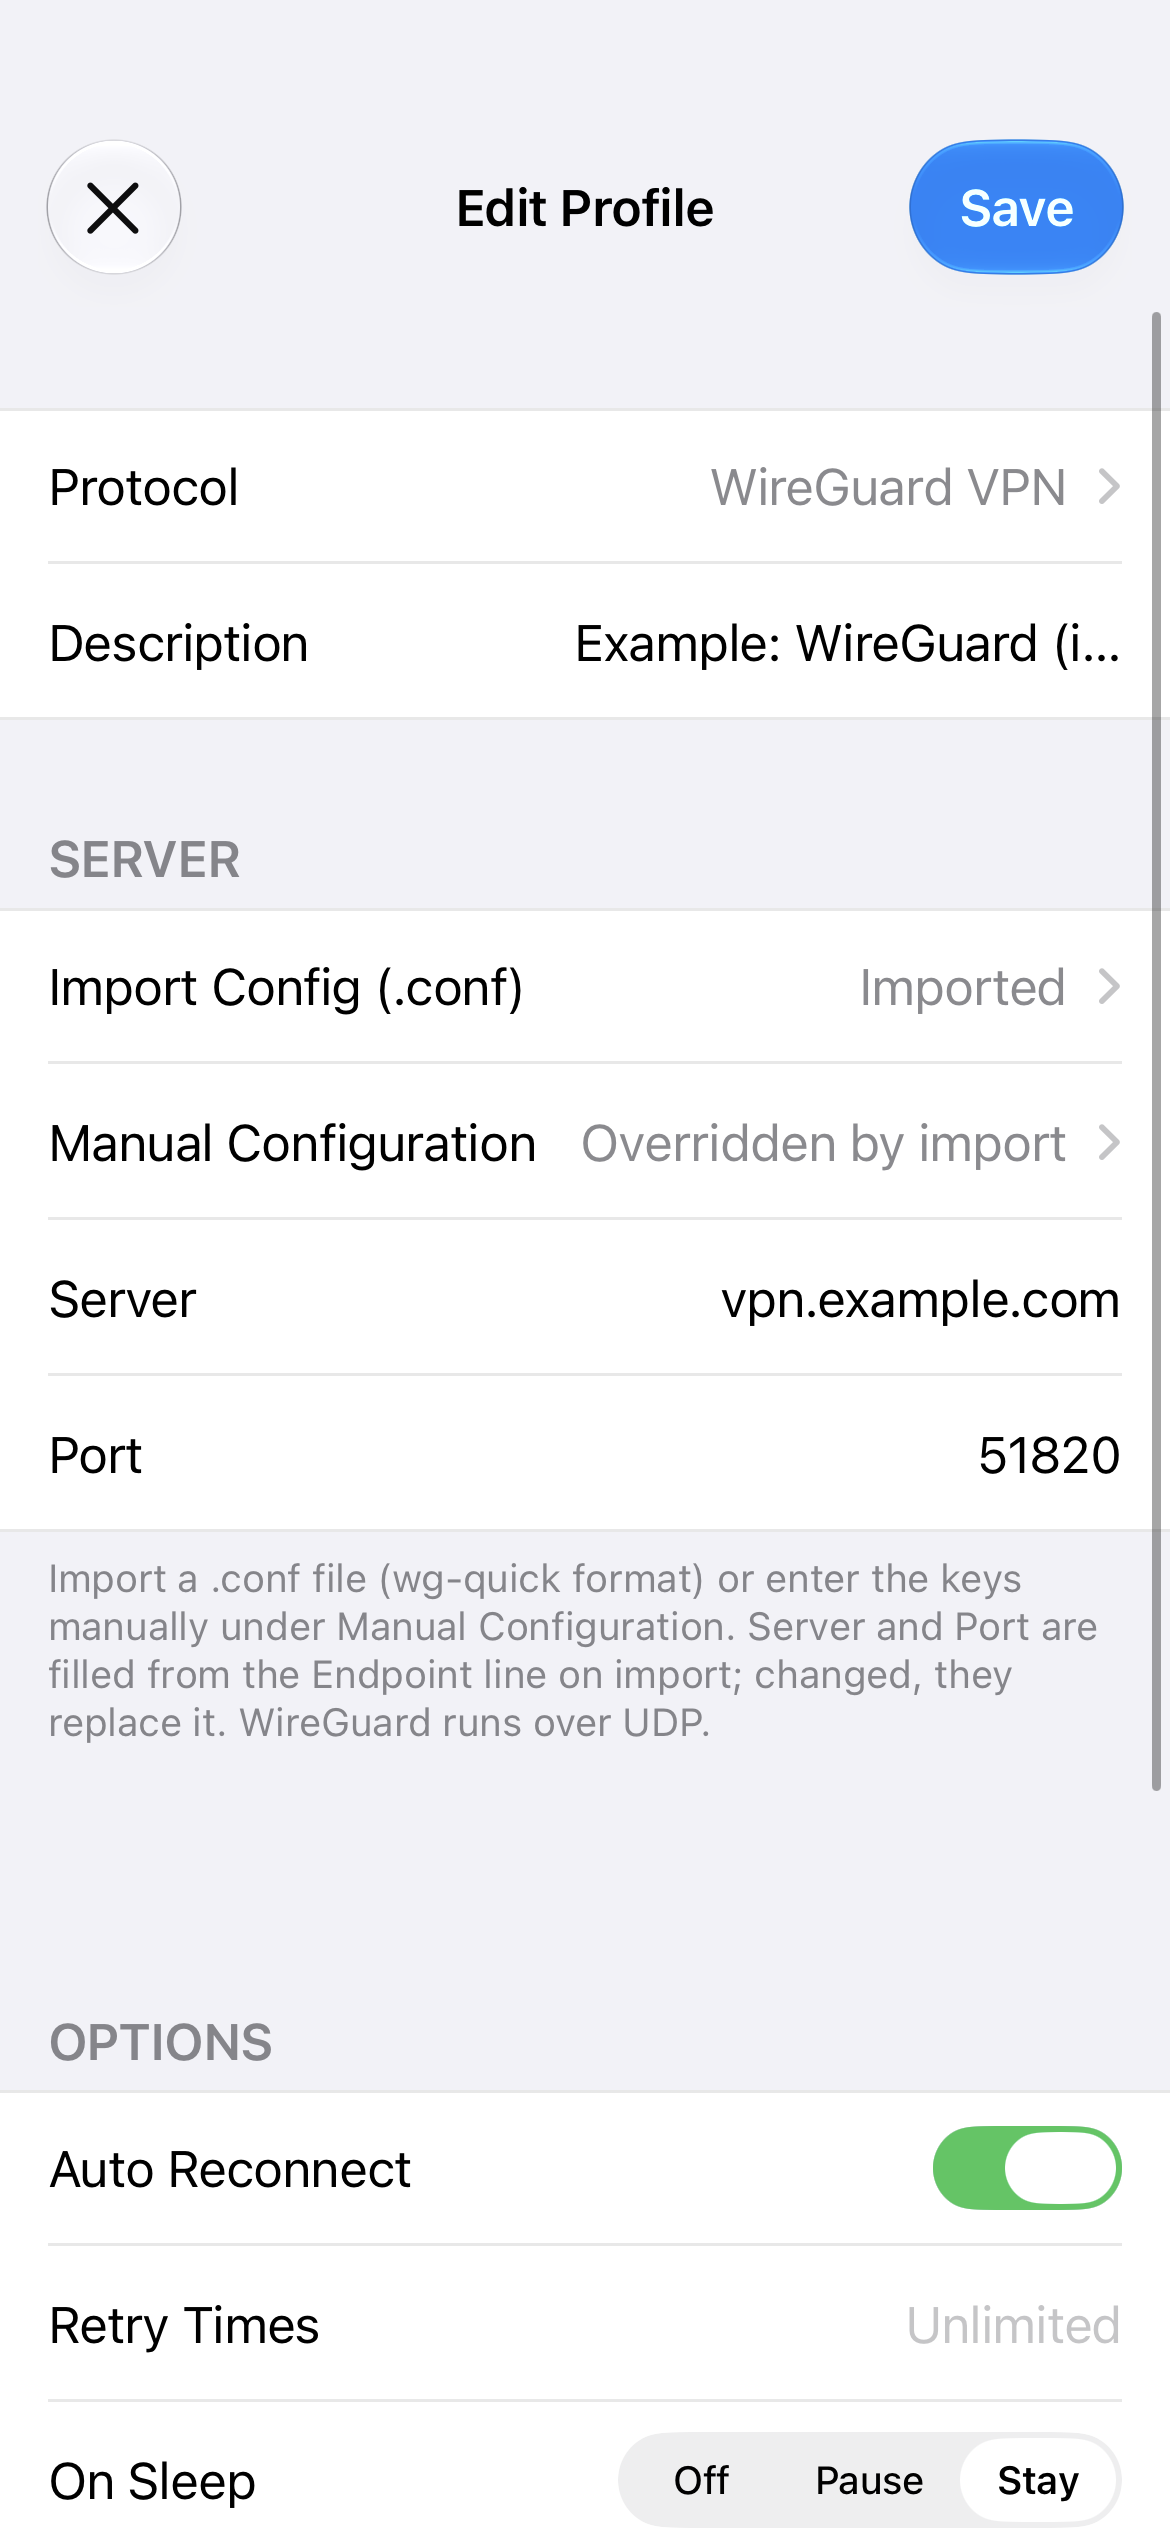
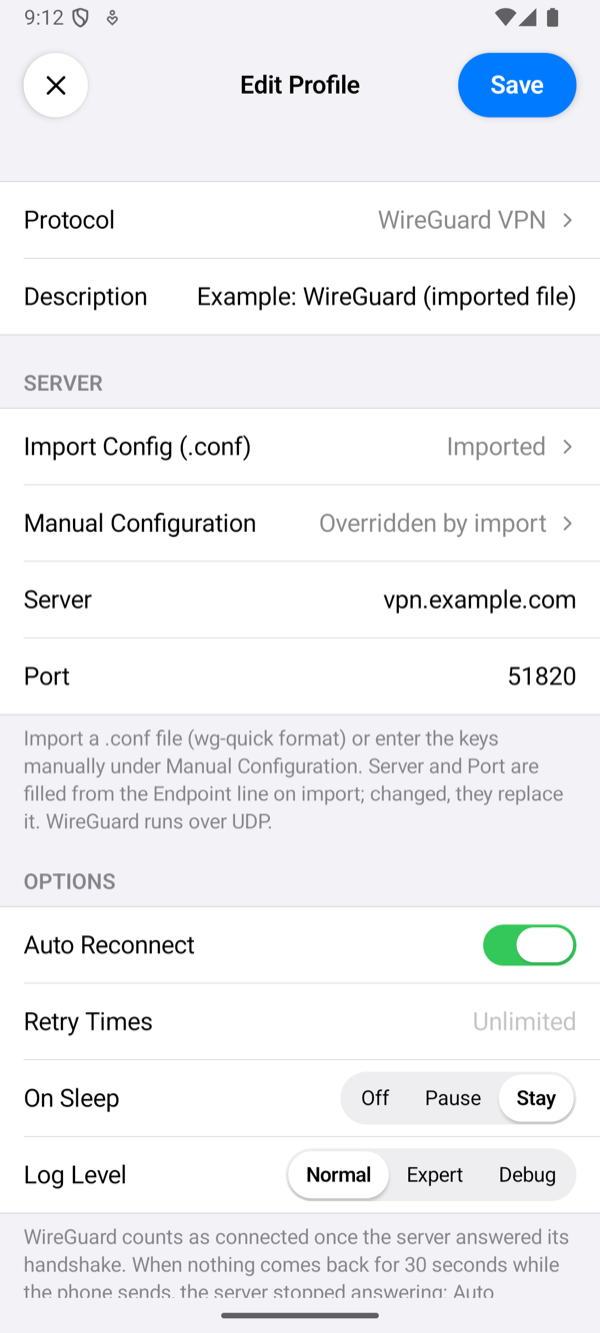
- Description: optional, the profile's name on the home screen. When it is empty, the home screen shows the server's name or address.
- Tap Import Config (.conf). It opens the phone's files: choose
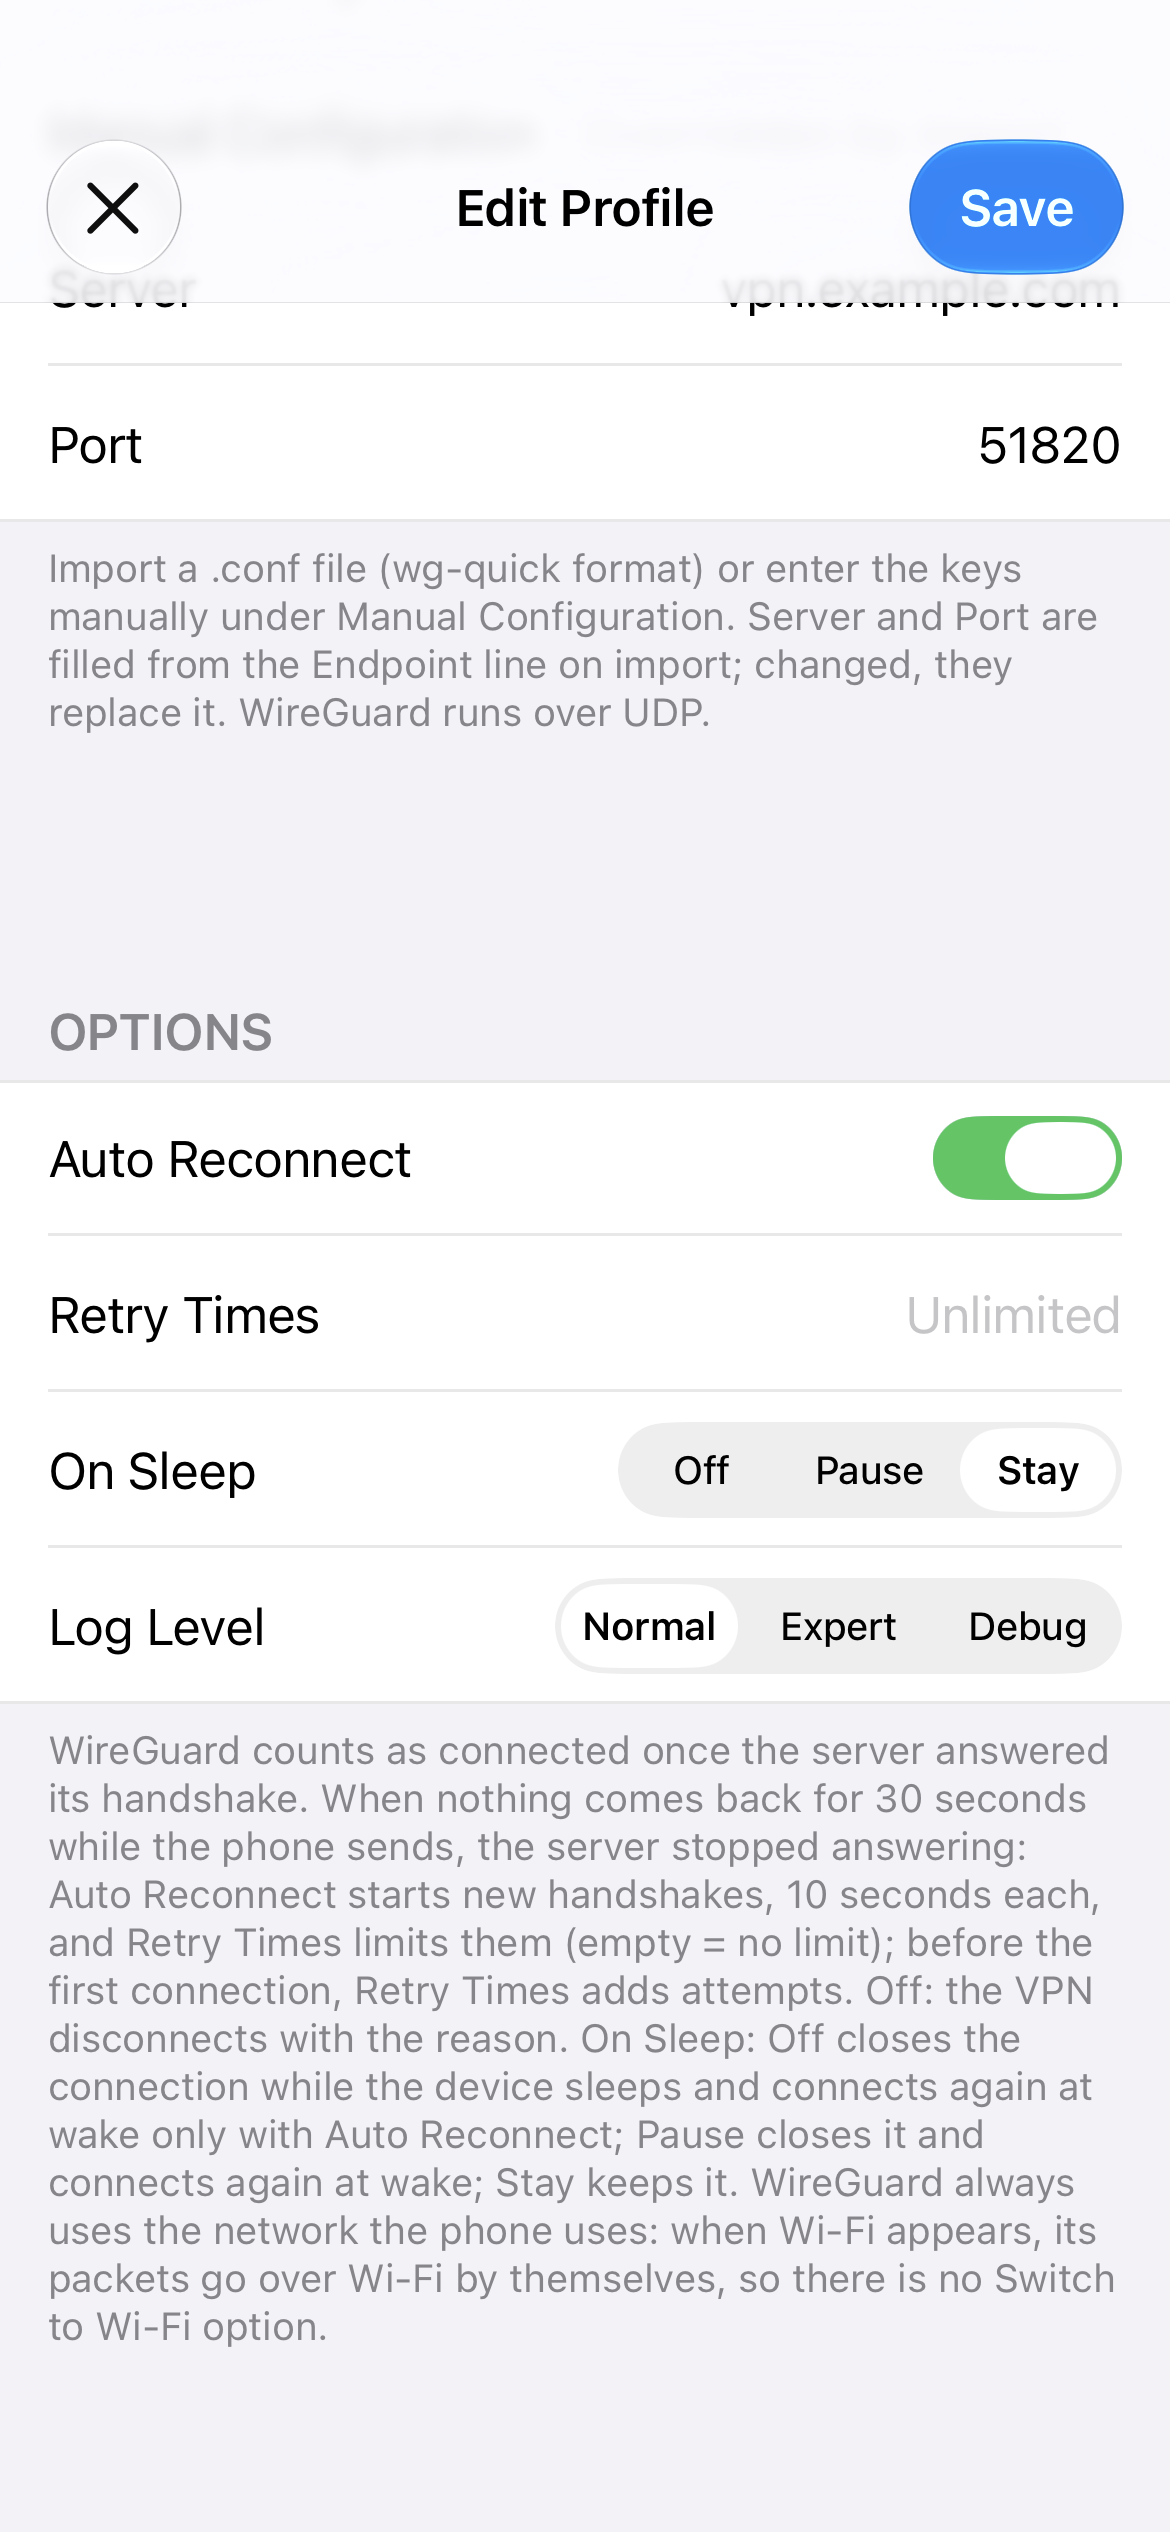
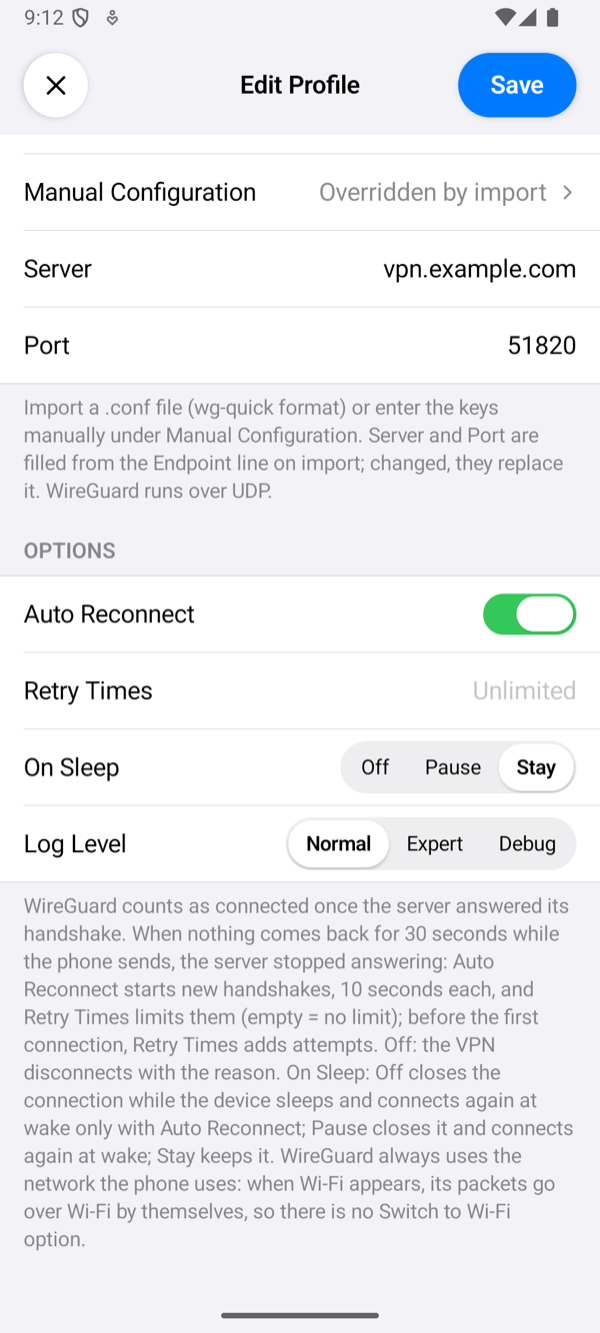
phone1.conf. The row then says Imported, and Server and Port fill themselves in from the file'sEndpointline: the name or address you put inendpoint=, and 51820. The file also brings the phone's keys, so leave Manual Configuration as it is: its row says Overridden by import. - Leave everything under Options as it is, and tap Save.
- Delete the copies of
phone1.confyou do not need, as part 4 says: the app keeps the file, on iPhone in the Keychain and on Android in its encrypted store.
Connect
- Select the profile on the home screen and tap the power button.
- The first time, the system asks for permission: iOS asks whether the app may add a VPN configuration, and Android shows a Connection request. Allow it.
- The status changes to Connected once the server has answered the handshake, and the row of the profile then shows the time of one request through the tunnel.
wg show wg0 as in part 6: the peer whose allowed ips are 10.66.66.2/32, the address part 4 gave phone1, now has an endpoint, a latest handshake and its transfer. If the app shows Connection Failed instead, tap the status under the power button to open the log, and see Troubleshooting, which explains each message.
Setting up the app describes every field.